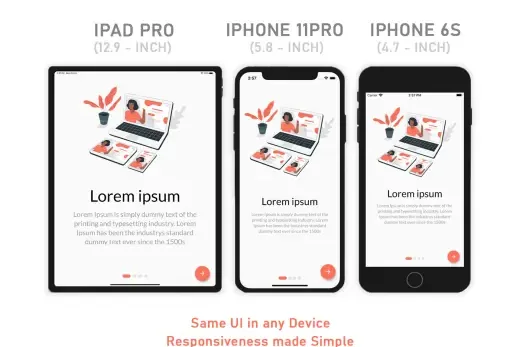
Flutter is a powerful framework for building native apps for iOS, Android, and other platforms. One of the key features of Flutter is its rich set of layout widgets, which enable you to build beautiful, responsive user interfaces quickly and easily.
In this article, we’ll explore some of the most commonly used layout widgets in Flutter and how you can use them to create layouts for your Flutter app.
Introduction to Layout Widgets
Layout widgets in Flutter are used to arrange other widgets on the screen. They provide a way to control the size and position of widgets and to specify how they should be aligned with each other. Flutter provides a rich set of layout widgets, each with its own set of properties and capabilities.
Some of the most commonly used layout widgets in Flutter include:
Container: A widget that provides padding, margins, and constraints around its child widget.Column: A widget that arranges its children in a vertical column.Row: A widget that arranges its children in a horizontal row.Stack: A widget that stacks its children on top of each other.Expanded: A widget that fills available space in its parent widget.SizedBox: A widget that specifies a fixed size for its child widget.
Let’s take a closer look at each of these widgets and how you can use them in your Flutter app.
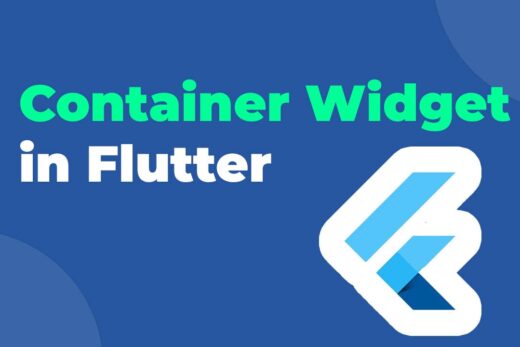
Using Container Widget
The Container widget is a powerful widget that provides a wide range of layout capabilities. You can use it to add padding and margins around its child widget, set a background color or image, and even provide constraints on its child widget’s size.
Here’s an example of how you can use the Container widget to add a background color and padding to a child widget:
Container(
  padding: EdgeInsets.all(16),
  color: Colors.blue,
  child: Text('Hello, World!'),
)
In this example, we’re adding padding to the child widget by setting the padding property to EdgeInsets.all(16). We’re also setting the background color of the Container to Colors.blue.
You can find my other article about the container widget here.
Using Column Widget
The Column widget is used to arrange its children in a vertical column. You can specify how each child should be aligned within the column by setting its crossAxisAlignment property.
Here’s an example of how you can use the Column widget to create a vertical list of items:
Column(
  crossAxisAlignment: CrossAxisAlignment.start,
  children: [
    Text('Item 1'),
    Text('Item 2'),
    Text('Item 3'),
  ],
)
In this example, we’re using the Column widget to arrange three Text widgets in a vertical column. We’re also setting the crossAxisAlignment property to CrossAxisAlignment.start to align the text at the left of the column.
Using Row Widget
The Row widget is used to arrange its children in a horizontal row. You can specify how each child should be aligned within the row by setting its crossAxisAlignment property.
Here’s an example of how you can use the Row widget to create a horizontal list of items:
Row(
  crossAxisAlignment: CrossAxisAlignment.center,
  children: [
    Icon(Icons.home),
    Text('Home'),
  ],
)
In this example, we’re using the Row widget to arrange an Icon widget and a Text widget in a horizontal row. We’re also setting the crossAxisAlignment property to CrossAxisAlignment.center to align the items at the center of the row.
Using Stack Widget
The Stack widget is used to stack its children on top of each other. You can specify how each child should be positioned within the stack by setting its positioned property.
Here’s an example of how you can use the Stack widget to position two widgets on top of each other:
Stack(
  children: [
    Image.network('https://example.com/image.jpg'),
    Text('Caption'),
  ],
)
In this example, we’re using the Stack widget to stack an Image widget and a Text widget on top of each other. By default, the first child in the Stack is positioned at the top of the stack, and subsequent children are positioned below it.
Using Expanded Widget
The Expanded widget is used to fill available space in its parent widget. You can use it to ensure that a child widget takes up all the available space in a Row or Column widget.
Here’s an example of how you can use the Expanded widget to ensure that a Text widget takes up all the available space in a Column:
Column(
  children: [
    Expanded(
      child: Text('Lorem ipsum dolor sit amet'),
    ),
    Text('Consectetur adipiscing elit'),
  ],
)
In this example, we’re using the Expanded widget to ensure that the first Text widget takes up all the available vertical space in the Column. The second Text widget is positioned below the first one and takes up only the space it needs.
Using SizedBox Widget
The SizedBox widget is used to specify a fixed size for its child widget. You can use it to ensure that a child widget has a specific width or height.
Here’s an example of how you can use the SizedBox widget to ensure that an Image widget has a fixed size:
SizedBox(
  width: 200,
  height: 200,
  child: Image.network('https://example.com/image.jpg'),
)
In this example, we’re using the SizedBox widget to ensure that the Image widget has a fixed width and height of 200 pixels.
Conclusion
Layout widgets are a powerful tool for building beautiful and responsive user interfaces in Flutter. By using the Container, Column, Row, Stack, Expanded, and SizedBox widgets, you can create a wide range of layouts for your Flutter app. Whether you’re building a simple app or a complex one, mastering the layout widgets in Flutter is essential for creating a great user experience.
You can refer to flutter’s official documentation for detailed information about layout widgets.

This article was really helpful in understanding how to use layout widgets in Flutter. I was able to create a beautiful UI for my app using these techniques. Thanks for the detailed explanations!
I recently started learning Flutter and came across your article on layout widgets. It was a game-changer for me as a beginner! The explanations and examples helped me understand how to structure my UIs effectively. I can now create beautiful and responsive layouts with ease. Thank you so much!
As an experienced Flutter developer, I found your article on layout widgets to be a helpful refresher. It’s always good to revisit the basics and ensure a solid foundation. Your explanations were clear, and the practical tips you shared are valuable for optimizing UI performance. Great job!
I totally agree with Michael’s comment! Your article on layout widgets is a fantastic resource for beginners like me. I’ve been struggling with organizing my Flutter UIs, but your explanations and visual examples made it much clearer. I now have the confidence to tackle more complex layouts. Thanks for sharing your expertise!
Layout widgets are fundamental in Flutter, and this article provided a comprehensive overview. The explanations were thorough, and the visual examples clarified the concepts. Now I feel more confident in designing appealing and responsive layouts in Flutter. Thanks for sharing your knowledge!